“Mom……what’s for supper?”

27 Apr

I am sure that all us Moms have heard that more times than we’d care to remember! Every morning I wake up and start to plan the evening meal. Decisions, decisions!! Well, tonight I made what our family calls, Naked Chicken! Actually it is un-fried chicken, but when the kids were little, they’d call it naked chicken!  The secret to this recipe is to make sure both the chicken and the yogurt are very cold ( hence, soaking the chicken in ice water). The preliminary soaking will help the breading adhere and produce a crisp coating just like that of fried chicken.
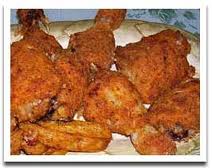
unfried chickenRaw chicken may contain bacteria that can cause illness. While the bacteria is destroyed by thorough cooking, care should be taken to avoid contaminating your work area and other foods with raw poultry juices. And make sure your chicken is cooked to 170 degrees with an instant read thermometer, or until juices run clear and you can no longer see any pink or red flesh once the meat falls away from the bone.

Ok…..enough of Chicken 101! Are you ready to try un- fried chicken? Lets go!

To begin, you will need:

Light vegetable oil cooking spray

1 whole, deskinned frying chicken

3 1/2 cups ice water

1 cup plain nonfat yogurt

For the breading:

1 cup dried Italian bread crumbs

1 cup all-purpose flour

1 tablespoon Old Bay seasoning

1/2 teaspoon garlic powder

1/2 teaspoon Creole seasoning

1/8 teaspoon black pepper

Dash cayenne pepper

1/2 teaspoon dried thyme

1/2 teaspoon dried basil

1/2 teaspoon dried oregano

First…..preheat Mister Oven to 400 degrees. A little warmer than usual! Coat your best baking sheet with 3 sprays of the cooking spray. Place that big, fat chicken in a large bowl with the ice water. It won’t hurt him or her, after all, we are going to EAT it!! Put your yogurt in a medium bowl. Set both bowls aside.

Second……toss all of the breading ingredients into a large, tightly sealing plastic bag. Seal that bag real good and shake it up to mix the ingredients.

Now….remove 2 pieces of chicken from the ice water. I am sure the chicken appreciates it! We are going to give the chicken some warmth by rolling it a coat of yogurt. Place the yogurt wearing chicken into the bag of seasoning and toss real well. Transfer that lovely breaded chicken to the prepared baking sheet. Repeat this process until all the pieces are wearing matching yogurt breading. Spray the chicken lightly with the vegetable oil, like a mist of suntan oil! It is going to be very hot where they are going!!

Last…..place the baking sheet on the bottom shelf of the oven and bake for 1 hour, turning these lovelies over every 20 minutes so their golden brown. Make sure they reach 170 degrees before removing from Mister Oven to ensure doneness.

There you have it….the Santilli Family recipe for Naked Chicken!!
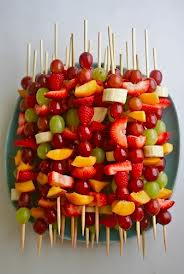
 

Fruit Kebabs

25 Apr

fruit kebabsThis is an appetizing way to serve fruit-one that will appeal to youngsters as well as to adults. I like to serve the kebabs along with spiced bran muffins for a healthy breakfast. They also make great snacks or dessert. You can make kebabs with any fruit that will stay on the wooden skewer! The picture shown is just a variety of ways to make them. Kids love to make them too, just make sure there is adult supervision.

Spiced Bran Muffins

25 Apr

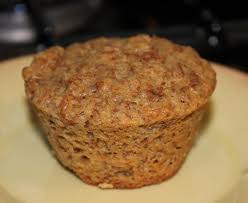
We all know that bran is an important source of carbohydrates and fiber, but the primary appeal of these muffins are their distinct flavor. They taste a little bit like gingerbread, only with raisins and nuts! These muffins are great with apple butter and with fruit kebabs alongside. Fruit kebabs are next on my list of posts for today. For you calorie and fat counters, this muffin has 2.1 grams of fat and 123 calories per serving!

bran muffins

For this healthy and delicious muffin, you will need:

Light vegetable oil cooking spray

1/2 cup molasses

2 tablespoons honey

2 large egg whites

1/4 cup plain nonfat yogurt

1/4 cup 2% milk

1/2 cup wheat bran

1 cup whole wheat flour

1 1/2 teaspoons baking powder

1 tablespoon ground ginger

1 teaspoon ground cloves

1/4 cup chopped walnuts

1/4 cup golden raisins

Let us begin! Go on over and preheat Mister Oven to 350 degrees. He likes it like that!! Now, coat a 12-well muffin tin with the cooking spray. We need to now warm the molasses and honey in a small saucepan over low heat until it just begins to steam. Remove from the heat and set aside to cool. Now, whisk the egg whites, yogurt and milk together in a large bowl until you have blended it real well. Whisk in the molasses and honey mixture. Using a wooden spoon ( I have tried other spoons and a wooden one works best!), stir in the bran, then flour, baking soda and all the spices. Fold in the walnuts and raisins. Almost done!  Fold the batter into the prepared muffin tin and bake for 15 to 20 minutes, or until a tooth pick inserted in the middle comes out clean. Serve warm with apple butter. The apple butter does add a few more calories…..but it sure tastes good!

Peach Crepes

25 Apr

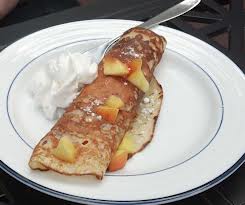
This sophisticated dessert is light and refreshing. Making crepes is somewhat easy, as long as you allow yourself leeway for initial trial and error. Don’t be disappointed, like I was, if your first crepe or two aren’t perfect, the pan has to season just right and be at just the right heat. Although this recipe yields 8 crepes, you will have enough batter for 12 to 14. For a really elegant presentation, top each crepe with a few blueberries or garnish with a slice or orange.

peach crepe

For the crepes you will need:

1/2 C. all-purpose flour

1 large egg

3 Tablespoons Amaretto-flavored nondairy creamer

1/2 C. milk

1/2 teaspoon ground nutmeg

1 teaspoon pure vanilla extract

vegetable oil cooking spray

For the filling you will need:

2 C. freshly squeezed orange juice

2 tablespoons orange liqueur

8 peaches, peeled and thinly sliced

1 teaspoon honey

1 teaspoon ground cinnamon

1 teaspoon orange zest

Let us start by putting on a french beret and saying oui, oui!! I just love cooking continental! I like to pretend I am in another country. Ok…..put the flour into a mixing bowl and make a well in the flour and add the egg. Whilst whisking, pour the nondairy creamer and the milk. Continue to whisk until the batter is smooth and free of lumps, then whisk in the nutmeg and vanilla. Cover the batter and set it aside for about 30 minutes. We are now ready to make the crepes.

Preheat an 8-inch nonstick crepe pan or a small, heavy nonstick frying pan for about 1 minute over a medium-high heat, Spray it twice with the vegetable oil spray, Spoon just enough batter into the pan to form a thin layer over the bottom, about 3 tablespoons, and tilt your pan to spread the batter evenly. Whew! Cook the crepes for about 1 to 2 minutes or just until the edge is firm and starts to separate from the bottom. Flip the crepe with a spatula and cook for 1 to 2 minutes more on the other side, until golden brown. Carefully remove the crepe and transfer onto waxed paper. Continue this process, stacking them between the waxed paper, until you have 8 nice crepes.

For the filling, combine the orange juice, liqueur, peaches, and honey in a medium frying pan. This needs to cook for about 10 minutes or until the liquid turns nice and thick, like syrup.

To assemble your beautiful, hard-worked for crepes, lay a crepe on an individual serving plate. Mound 1/3 cup of the peach slices on the bottom half of each and flip the top half over. Spoon a tablespoon of the peach syrup over each and dust with cinnamon and powdered sugar.

There you have it…….peach crepes! Don’t get discouraged if your first few crepes fall apart, mine did! Practice and determination show the fruit of your labor with this beautiful crepe.


Cheesecake Stuffed Strawberries

25 Apr

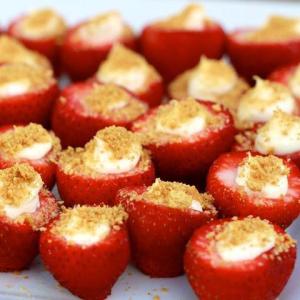
stuffed strawberriesNo – bake desserts are the perfect summertime delights. No oven? No problem! Ah….the strawberry……a blissful reward from summer’s bounty! I like to make these little beauties for Memorial Day or 4th of July gatherings. Most people think it takes gourmet skills to prepare such delights, but you and I know that it only takes a little time and patience; and trial and error! Try to pick out berries that are somewhat uniform in size and are full.

You will need:

1 lb. Large Strawberries

8 oz. Cream Cheese, softened

4 Tablespoons Powdered Sugar

1 Teaspoon Pure Vanilla Extract

Graham Cracker crumbs, for garnish

Okay…..lets get ready! We need to rinse the strawberries really well to remove any dirt or debris. Now, cut around the top carefully and clean out with a pairing knife. Strawberries are delicate, so be gentle! Next, in a medium mixing bowl, beat cream cheese, sugar and vanilla extract until very creamy. Put the cream cheese mixture in a pastry bag or in a ziplock bag with a corner snipped off and fill your strawberries. Once your strawberries are nicely filled, dip in graham cracker crumbs for effect. You may also drizzle chocolate on top of your creation too. If you are not serving immediately, put in refrigerator.

No one needs to know how easy they are to make……just accept the applause and say ” Thank you!”

Snicker Salad with Carmel Sauce

25 Apr

When the weather turns warm, the last thing you want to do is stay in the kitchen slaving over a hot oven! I have several “no bake” recipes that I will share today. The first is this wonderful Snicker Salad. My sister, Lisa, had told me about this salad. I had ever heard of it before coming to Iowa. Most folks up here call this a salad, I call it dessert. Either way….I Like It!!  It is light and sweet with a tasteful variety of textures. Let me know if you like it!!!

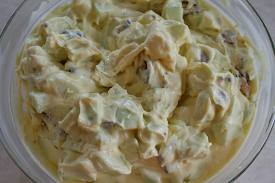
snicker saladI didn’t add a carmel drizzle to this after I made it, but it looks beautiful with it and tastes even better!

You will need:

6 Regular size Snicker’s candy bars

6 Apples – Red Delicious or Granny Smith

1 5 oz. Vanilla Instant Pudding ( Dry)

1/2 C. Milk

1 12oz. Container Cool Whip

1/2 C. Carmel Ice Cream topping, if desired

To start making this scrumptious salad, whisk your pudding along with the milk and Cool Whip until combined. Set aside…..just for a few minutes. Now, chop and de seed the apples. Also, cut the Snickers into bite size pieces. I have tried using the smaller individual wrapped ones and they are much harder to work with. Now its time to put this baby together! Mix your apples, Snickers into the pudding/Cool Whip mixture. Really get in there and mix it good!! At this point you may add a carmel drizzle, if you like. Chill at least 1 hour before serving.

My Sister Lisa

21 Apr

For those of you that are following my blog, you know this is a site I started with recipes and I plan to mix it up a bit in the near future. So, this post today, is a lot different! No cute anecdotal remarks about cooking or how cold & miserable it is here in Iowa right now. Those thing will be posted another day, perhaps tomorrow. But today, is about my beloved sister, Lisa. Lisa and I were born 25 months apart and grew up in Tampa florida. In my memory, I can’t recall seeing two sisters as close as us. Oh, I am sure there are very close sisterhoods, but Lisa and I were just great together. I got married when Lisa was 16. She was so sad when I left home. I received daily letters from her; she couldn’t spell and it took me quite sometime to decipher them! It was well worth it in the end.I missed her as much as she missed me too.  As my new station in life as a newlywed took my husband  and I on our own adventures, Lisa managed to find a way to do just fine without me. Albeit, I wanted her to miss me! Silly girl I was! After my husband served in the U. S. Navy in California and Great Lakes Illinois, we made our way back home to the comfort of family. Lisa came right along with me too! I would have to say, that we have only been apart maybe 10 years of our lives. And I will be 50 in August!!! I think I should mention that I also have two other sisters. I was 11 when Robin was born and 16 when the last girl ( of 4, my poor father!), Lindsay was born. I didn’t really spend many of Robin and Lindsay’s formative years with them. They were, and are, my little sisters. But there is a difference between them an I of epic proportions.Lisa is the sister that I had shared childhood memories with!In the summer of 2010, I moved to Bode Iowa. Lisa had to remain in Florida. Our parents bought all of their girls homes. What a great feeling to be mortgage free!! As soon as Lisa was able she made her way up here in July 2011. I was so happy to have my best friend here, finally!!! Bode is like Mayberry RFD……what a culture shock! Vastly different from Central Florida…..I love it here. I am not loving it quite as much as I once did, though.

lisa54This is Lisa, by the way!!

My best friend and little sister, died suddenly on October 21, 2012. Six months ago, today! My grief is all-consuming and quite overwhelming. I had to take care of Lisa’s end of life needs as our parents were unable to breathe, let alone make funeral arrangements! I was with Lisa as she transitioned from this Earthly place to the next and that was the hardest thing I have ever done!! I DO NOT want ANYONE with me! Period. At least not family. I have been told by numerous doctors and councilors, that I gave Lisa the most precious gift by being with her. I have my doubts.

Six months……six months……it has been six months today that she died! I can’t even accept that I typed that! My life is so empty without her. Lisa was the “ying to my yang”, she evened me out!  I cry everyday and beg for her to show me a sign from the great beyond……no clear cut message so far! My grief shows no sign of slowing.  So, what is this life for? Lisa was unafraid to die, she told me so. I, on the other hand, just wasn’t ready to be without her. And I still am not. The hours have grown into days and the days into weeks. Weeks are now months and I still feel the same gnawing ache. What is my “new normal”? A life without my sister? I know that I will continue on, I must! I have a husband and two children that count on me, but I am broken.

I wanted to write this all down, thinking it may help. It didn’t! As I leave to go to the cemetery, I whisper ever so softly…..” I Love You Lisa and I ALWAYS will remain your Big Sissy, Kim.”


S’mores Ice Cream Cake

17 Apr

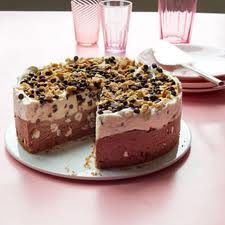
smores cake

This wonderfully delicious ice cream cake is another one of my favorites! Through many trials and errors this recipe is, by far, worth the effort.  Everyone has had s’mores ’round a campfire, right? I have many pleasant memories of family times spent by a campfire. Whether it was camping with my parents and sisters as a kid or spending a quiet evening with my husband by our garden fire pit, memories come flooding back. Let me know what your favorite campfire moments are! Maybe this ice cream cake will conjure up old memories of good times spent around a campfire or will put you in the mood to make some new memories. Either way, this ice cream cake is sure to please!

You will need:

10 graham crackers

2 Tbsp. butter, at room temperature

4 oz. bittersweet chocolate

1 14 oz. can sweetened condensed milk

1 1/2 tsp. pure vanilla extract

2 cups heavy whipping cream

1 cup mini marshmallows

1/4 cup mini chocolate chips

Firstly, go over and preheat Mister Oven to 350 degrees. Nice & toasty! Next, line the bottom (only) of an 8 inch springform pan with parchment paper. Parchment paper has become my new best friend!! Now, in a food processor, pulse 8 graham crackers, until finely ground. If you don’t have a food processor, the old-fashioned way of using a plastic bag and rolling-pin to crush the crackers will suffice. Add the butter now until well mixed. Press the graham cracker mixture into the bottom of your prepared pan. Bake until golden brown, about 8 – 10 minutes. Let cool completely, about 25 minutes.

Now, you are ready to make the sinful chocolate layer! Start by melting the chocolate (not the chips) in the microwave, let cool slightly. Use your electric mixer to beat the chocolate along with, half the sweetened condensed milk and 1/4 tsp. of vanilla in a large bowl until completely combined. Add 1 cup of the heavy cream and beat until you have thick, stiff peaks form. Fold in the marshmallows. Now we are ready to spoon the mixture on top of the cooled crust. Spread it evenly. Are you getting excited yet?! Clean the bowl. We are going to use the same bowl to make our ice cream for the top. Using an electric mixer, beat the heck out of the remaining condensed milk, vanilla and heavy cream until thick, stiff peaks form (again!). Usually, 3 – 5 minutes. Fold in 1/2  cup of the mini chocolate chips. Spread this on top of the chocolate layer. Almost done!! Next, break the remaining 2 graham crackers into tiny pieces. Sprinkle them along with the rest of the mini chocolate chips over the top. Cover it well and freeze until firm, at least 8 hours.

When you are ready to serve, unmold your creation and transfer to a pretty platter. Let it sit for 5 minutes before slicing. Viola…….one scrumptious, s’mores ice cream cake!! Enjoy…….

Cheesy Appetizer Loaf

14 Apr

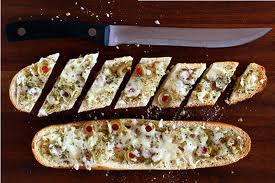
cheesy loaf

Nothing tastes better than warm, crusty bread! My husband, Pat, is of Italian descent and he LOVES bread. I made this appetizer loaf with him in mind. You can adapt this to whatever your families preferences are. Sometimes, I make this simply with cheese and browned sausage. My son, Nico, likes it that way. The key to moist, broiled bread is; you have to put either butter or as in this case, mayo on it first. Mix it up and have fun with it. Mama always said “Don’t play with your food”, well I say, go ahead and have FUN!!

You will need:

3 Tablespoons of Mayonnaise

1/2 Teaspoon Garlic Powder

1 8 oz package of Kraft‘s Mozzarella Cheese Crumbles

2 Tablespoons Spanish Olives

1 Loaf of French Bread, cut length wise, in half

Make your way over to the oven and set in on broil. Next, mix all ingredients together and spread on bread. See, I told you it was simple! Now, broil 6 inches from heat for 1-2 minutes or until cheese is nice and melted.

You may also use chopped mushrooms, finely chopped ham or turkey. Actually, like I said before, you can make this anyway you like. Just don’t forget to moisten the bread first!


Strawberry Ice Cream Cheesecake

13 Apr

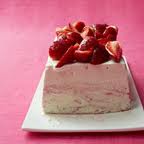
straw. ice cream ch cake This recipe calls for a bit more preparation than my other simple recipe for ice cream. The ingredients are about the same, but the process is a bit more intricate. I have made this with both a food processor and a blender, and the food processor is much better. You can still make it even if you don’t have a food processor, it just takes patience!

You will need:

1 14 oz. can Sweetened Condensed Milk

1/2 C. Cream Cheese, at room temperature

1 1/2 Teaspoons Pure Vanilla Extract

2 C. Heavy Cream

1 lb. Strawberries

2 Teaspoons Sugar

Line an 8 1/2 x 4 1/2- in. loaf pan with 2 pieces of parchment paper, leaving a 3-in. overhang on all 4 sides. Using an electric mixer, beat the condensed milk, cream cheese and vanilla in a large bowl until combined. Add the heavy cream and beat until thick, stiff peaks form, 3 to 5 minutes. Meanwhile, using a food processor or blender, puree half of the strawberries. Spoon half of the vanilla cream mixture into the prepared pan, spreading it evenly. Tap the pan to get rid of any air bubbles. Fold 1/3 of the strawberry puree into the remaining cream mixture until combined. Spoon remaining strawberry puree over the pink cream mixture and fold in, leaving streaks of the puree to create swirled cream. Spoon over the vanilla cream in pan. Gently tap the pan to distribute the mixture and get rid of any air bubbles ( spreading will destroy the swirls). Cover and freeze for at least 8 hours and will keep for 2 weeks.

Thirty minutes before serving, cut the remaining strawberries into pieces and toss with the sugar. Let sit, tossing occasionally, for 25 minutes.

When ready to serve, invert the cake onto a platter and remove the pan and parchment paper. Spoon the berries (and any juices) over the top.